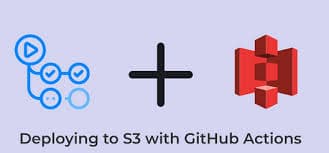
How to Deploy a Static Website to AWS S3 Using GitHub Actions
Automate your Static Website deployment to AWS S3
I'm a DevOps engineer | Technical Writer | Open Sourcer Building: https://logiq.netlify.app/
Introduction
Context:
Deploying static websites to AWS S3 is a cost-effective and scalable solution for hosting. Automating this process with GitHub Actions eliminates manual steps and ensures consistency in deployment.
Problem Statement:
Manually uploading files to S3 can be time-consuming and error-prone. As a DevOps Engineer, you need an automated solution to streamline this process.
Solution:
This guide demonstrates how to set up a GitHub Actions workflow to deploy your static website to an AWS S3 bucket automatically.
Prerequisites
AWS Account: Ensure you have an AWS account with access to S3.
GitHub Repository: A repository containing your static website files.
AWS CLI: Installed and configured locally for testing.
GitHub Actions: Enabled for your repository.
Step 1: Set Up an S3 Bucket
Create a Bucket:
Log in to the AWS Management Console.
Navigate to S3 and create a new bucket.
Configure bucket settings (e.g., enable public access for static websites).
Enable Static Website Hosting:
Go to the "Properties" tab.
Enable static website hosting and specify the index document (e.g.,
index.html).
Step 2: Generate AWS Access Keys
Create an IAM User:
Go to the IAM console and create a user with programmatic access.
Attach the
AmazonS3FullAccesspolicy (or a custom policy with least privilege).
Save Keys: Download the access and secret keys for later use.
Step 3: Configure GitHub Secrets
Add Secrets to GitHub:
Go to your GitHub repository.
Navigate to Settings > Secrets and variables > Actions.
Add the following secrets:
AWS_ACCESS_KEY_IDAWS_SECRET_ACCESS_KEYAWS_REGIONS3_BUCKET_NAME
Step 4: Create a GitHub Actions Workflow
Define Workflow File: Create a
.github/workflows/deploy.ymlfile in your repository.Sample Workflow Configuration:
  name: Deploy to S3

  on:
    push:
      branches:
        - main

  jobs:
    deploy:
      runs-on: ubuntu-latest

      steps:
        - name: Checkout Code
          uses: actions/checkout@v3

        - name: Configure AWS Credentials
          uses: aws-actions/configure-aws-credentials@v2
          with:
            aws-access-key-id: ${{ secrets.AWS_ACCESS_KEY_ID }}
            aws-secret-access-key: ${{ secrets.AWS_SECRET_ACCESS_KEY }}
            aws-region: ${{ secrets.AWS_REGION }}

        - name: Sync Files to S3
          run: |
            aws s3 sync . s3://${{ secrets.S3_BUCKET_NAME }} --delete
Step 5: Test and Deploy
Push to Main Branch: Commit and push your changes to the
mainbranch.Monitor Actions: Check the GitHub Actions tab to monitor the workflow execution.
Verify Deployment: Visit your S3 bucket’s public URL to confirm the website is live.
Conclusion
Automating static website deployment to AWS S3 using GitHub Actions simplifies the CI/CD process, saving time and reducing errors. By following this guide, you can ensure efficient and reliable deployments for your projects.